Initial Setup R.J. Reynolds Tobacco Company Loyalty Program via Cloud CRM - How To
Written steps to setup Reynolds branded loyalty program discounts with Cloud CRM
Install Cloud CRM, choose free subscription plan.
If you need to install the app for the first time Open "App Market" and search for Customer plus plus cloud crm. This step can be completed on any clover device.When you find the Customer plus plus Cloud CRM app hit "Connect"
If you signed up for reporting of tobacco scan data for only one manufacturer for $29.99 then you should select "Basic Free Scan Data" This price plan will provide everything you need for the Loyalty program but will not include Age Verification Technology. If you wish to use Age Verification technology by CSI Works, but do not want to upgrade Tobacco Scan data reporting to all 3 manufacturers for $49.99, you can simply sign up for Age Verification Price plan at 9.99 and keep your tobacco scan data reporting for $29.99
Option Two Free with Age Verify:
If you subscribed to CSI Works Tobacco Scan Data reporting for all three Manufactures (Altria, Reynolds and ITG) at $49.99 then yo should choose "Free with Age Verify" price plan for your cloud CRM as at this subscription level you have Age Verification Technology included with your loyalty program for Altria, Reynolds and ITG.
Open Cloud CRM, navigate to Reynolds loyalty program
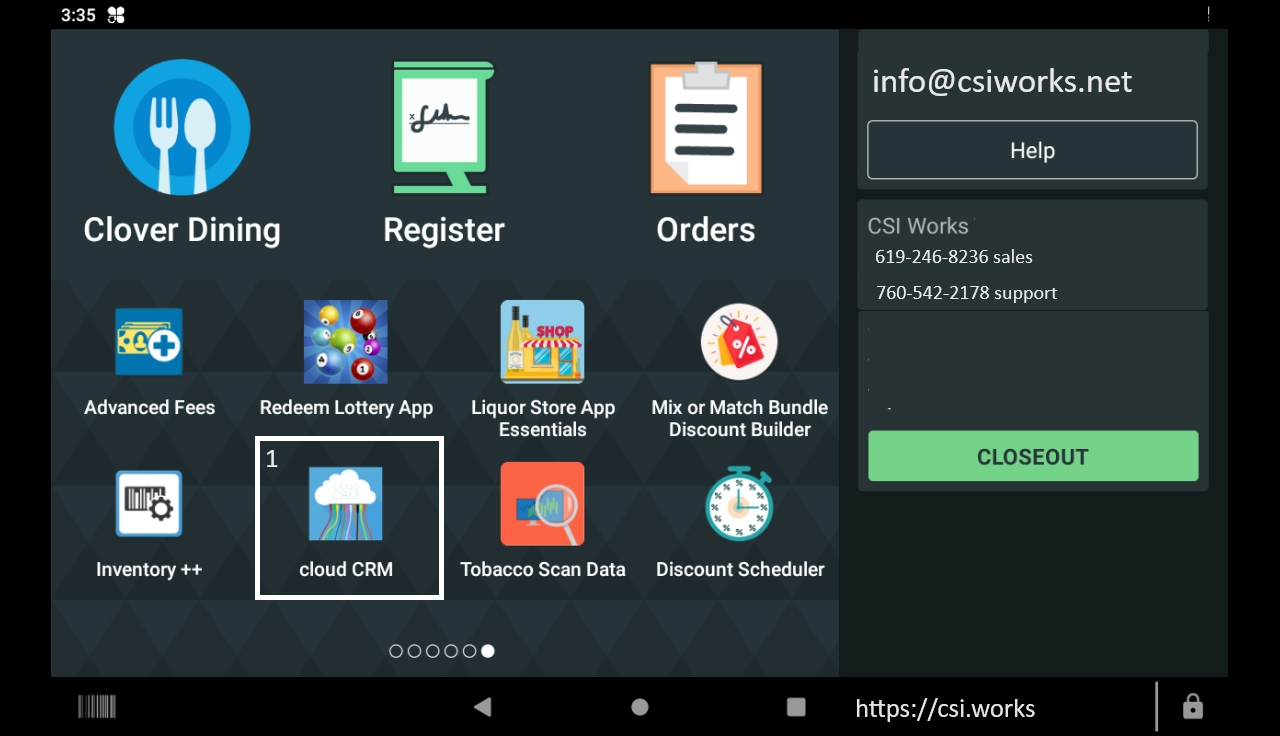
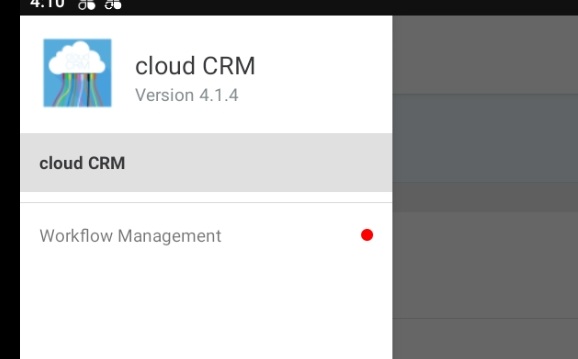
Step 1: Open cloud CRM by locating its Icon on your Clover home screen. Step 2: When app opens on your Clover device,click on three lines that open up the menu,
then click on Workflow Management.

Setup loyalty program(s) for all contracted brands.
The screen you've arrived to will reflect whatever currently running loyalty programs you may have. Since this is an initial setup the screen should have nothing setup and you'll notice a plus sign at the bottom of the right corner. Clicking that plus sign will take you to the screen where you can select a loyalty program you wish to activate.1. You can search for loyalty program by name or its loyalty Code.2. You can see the name and the loyalty code for each program listed.3. Scroll Down to see more programs available.1. Make sure the switch is turned on.2. Enter Item Count and Discount Amount (Item Count is how many items customer has to buy to trigger the discount. The discount amount is total discount that will be issued)3. Select a Mix (This enables customers to buy different SKU but still count toward the discount)4. When you click on Assign Items another screen will popup and it will show you the inventory already present in Clover. Just select all the items that qualify for the loyalty discount you are setting up. Only select packs that are associate with the brand you are setting up. For example below we are setting up Newport so only Newport packs can be assigned.
5. Discount Triggering Settings is where you indicate if discount will be on every X items or once per transaction or up to a carton.6. Hit Save when done.
Test Loyalty Program in transaction after activation
This is the last step. You've setup the Loyalty program and now when checking out in Clover Register app a Cloud CRM Screen will popup and ask you to assign customer. Customer can be found/created by entering phone number or selecting one from existing customers.-->
Video Demo: How to setup Reynolds Loyalty Program for Tobacco Scan Data on Clover with CSI Works
Video Demo: Levi Garrett Retail Loyalty Offer 2024 get setup with Reynolds loyalty program on any Clover
Video Demo: Loyalty Program by Reynolds for Newport and Camel or Vuse on Clover POS Tobacco Scan Data
Video Demo: Reynolds Lucky Strike Loyalty Program Setup Instructions on Clover with CSI Works
Video Demo: Grizzly Loyalty Program Setup on Clover Register System with CSI Works
Related Articles
Initial Setup Altria Loyalty Program via Cloud CRM - How To
Products Discussed: Cloud CRM for Altria Loyalty Program as part of Tobacco Scan Data Use Case: You have been sending tobacco scan data weekly reports to Altria Group. Now its the time to begin issuing the Loyalty Discounts (Where customers have to ...Initial setup R.J. Reynolds Tobacco Company Multi-Pack or Multi-Can Discount - How To
Products Discussed: Discount Scheduler for R.J.Reynolds Tobacco Scan Data. Use Case: You have been sending tobacco scan data weekly reports to R.J. Reynolds Tobacco Company. Your reports have been validated and certified, now is the time to begin ...In-Store loyalty program managed by merchant with cloud CRM and Guardoe
Products Discussed: Digital trade program via Cloud CRM, Guardoe. Use Case: Hi, we are convenience store and looking for consumer loyalty solution. We already are doing Altria Loyalty and Reynolds Loyalty for our tobacco vendors. CSI Works is our ...R. J. Reynolds Tobacco Company Scan Data Service Provider Selection Checklist
CSI Works provides the most comprehensive solution's for R. J. Reynolds Tobacco Company for merchants using Clover POS. If you are evaluating other service providers consider the following features and programs that merchant will need to participate ...How to setup Helix On! Loyalty and Multi pack discounts as part of Tobacco Scan Data
Products Discussed: Tobacco Scan Data Service, cloud crm, Discount Scheduler Merchant: We have been given green light by our Altria representative to begin offering Loyalty and multi pack discounts for Helix On! products. What do I need to do to set ...